Pages

Friday, March 27, 2009

The Stable


Review: Warhammer Stable

ForgeWorld's Warhammer terrain range offers some of the best medieval fantasy scenery on the market. I had been drooling over the photos on their website for long enough until I decided to place an order. In this post I document my impressions and experience with the first ForgeWorld piece that I assembled and painted for my Gierburg table: the Warhammer Stable.1

I have to say that I am not a few of Games Workshop's latest Empire terrain for Warhammer. It undoubtedly has a distinct style but personally I am not a fan of all the Sigmar comet symbols, skulls and other falderal. I have always loved Forge World's scenery, however, because of its more authentic historical feel.

After painting the first building for my Gierburg project, the Blue Wolf Inn, I decided it was time to get my hands on the Forge World buildings at last. The stable is a great addition to the inn (and easy to assemble) so I did that one first.

Contents
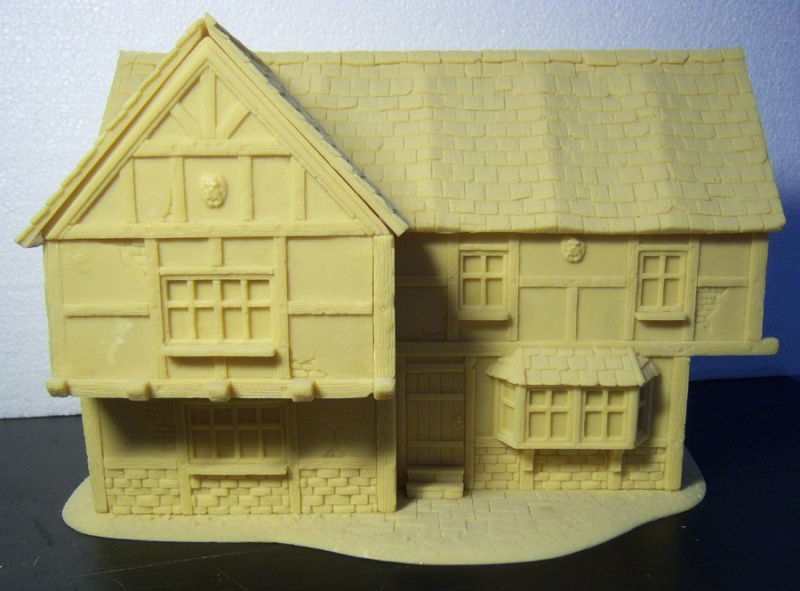
  • Main building
  • Roof
  • Beam
  • Wheel sprue with 2x 2 wheels
As you can see, aside from the beam which needs to be glued on the base, there is no further assembly required. A little filing off of some surplus resin and that's it. Well, if it weren't for two enormous chunks of resin at the bottom of the base (unfortunately I didn't take photos of them). It took a while to cut/file/rasp them off and it was rather exhausting, especially as I accidentally drove the building in my right thumb twice in the process, soaking the stable with blood even before it saw its first battle.


First Impression
These were my first impressions:
  • Larger than expected: Buildings tend to be smaller than you want them to be and this one was a nice surprise.
  • Great detail: The detailed stones in the walls and the structured wood are nicely done.
  • Lovely additional bits (on the model): There are two barrels, a bucket, a hay stack and hay spread inside the stable. That's some very nice extra detail that surely cannot be taken for granted.

Design
For this review I will grade the model as I described recently in the introduction of the Wrecking Ball Terrain Review article.
After the Blue Wolf Inn and the Burgomeister's Mansion (coming soon) I was somewhat apt to give a lower grade here. Surely a stable cannot compete with a huge inn or mansion in terms of impressiveness. But it doesn't have to and such a comparison would not be fair. It is a stable - that is what it is meant to represent, so it should be judged on that.

The stable is very nicely modelled: the detailed walls are sculpted on the in- and outside, the wood has a good structure, the roof sits nicely on the building and additional items such as two barrels, a bucket and a haystack round off the model. While it is great to have these items on the model it would have been better if they were removable. Especially the barrels get in the way of the brush when painting. Well, can't have everything, right? Ultimately, however, it is, of course, better to have these items than not at all.


Conclusion
The stable is a great building that comes at a very fair price (thanks to the current high of the Euro). The detail is pretty much perfect. The only deficits are the quality of the material. The resin itself is sturdy but at some places the paint won't stick (despite having washed the building prior to undercoating). Fortunately this was mostly only at the walls where the gray resin can be drybrushed to look like stone. These are only minor points though, and all in all the stable is nearly perfect: 4.5 of 5.


Painting the Stable
I really enjoyed painting the Warhammer stable. The roof and (structured) wood paint up nicely and fast so you get some good quick results that motivate further work. A first drybrush of Codex Grey on the stone walls soon gives you a rough idea of what the building will look like in the end. So you can get a great basis to work on after a short time so that you are motivated to go on and spend the extra time on figuring out how to do the stones.


Base/Ground & Roof
See the Blue Wolf Inn for how I painted the base/ground (Scorched Brown, Bestial Brown, Skull White) and the roof - I used the same technique and colours.


Stone Walls
Painting the stone walls took a lot of time. I found it much harder to get satisfying results on stone walls than on brickwork. Simple drybrushing is not sufficient as you need to mix and use a lot of colours and pay a lot of attention to the individual stones. This is pretty time consuming but, in my opinion, well worth the effort.

I tried to write down the steps I went through when painting the stones. I went through some "trial-and-error" but I think I figured it out alright in the end.
  1. Drybrush with 1/2 Codex Grey, 1/2 Chaos Black
  2. Drybrush with Codex Grey
  3. Drybrush individual stones with one of the following:
    • 1/2 Codex Grey, 1/2 Bestial Brown
    • 1/2 Codex Grey, 1/2Vomit Brown
    • Bleached Bone
    • Fortress Grey
  4. Drybrush with Codex Grey (tones down the previous layer)
  5. Drybrush with Fortress Grey
  6. Draw lots of small dots/stains/strokes on individual stones using one of the following:
    • Vomit Brown
    • Bestial Brown
    • Bleached Bone
    • Skull White
  7. Combining these stains creates a nice realistic effect. Mixing the colours and stains should be done in a way that feels right. It takes a lot of time and I could have spent even much more on it.

Vegetation
Again I used the same as for the Blue Wolf Inn: flowers from Silhouette, ivy from miniNatur and foliage from Antenociti's Workshop.


The finished Model
Alright. Enough talk - here are the pictures, enjoy:


_____________________________________
1Unfortunately the stable is currently out of production and not available in Forge World's online store (March 30th, 2010). Let's hope it returns soon!

Monday, March 16, 2009

The Wrecking Ball Terrain Review


"The Wrecking Ball" is a terrain and scenery review I will be doing on the blog. With my current terrain project Gierburg I am purchasing so many buildings that I thought it might be useful to write proper reviews for them. Usually the review will be part of a post that describes my work on the building from unpacking to the last paint brushes. The review will be the last thing I complete in that post so all the experience I made can be incorporated into the final judgement. I won't confine myself to houses, though. There will also be reviews on other things such as e.g. ships, which I collect for Legends of the High Seas.


Grades
The grades range from 0 to 5 and have the following semantics:

5 - Perfect
4 - High quality (very good)
3 - Moderate, average quality (okay/good)
2 - Low quality (bad, weak)
1 - Very bad
0 - Unacceptable


Assessment Criteria
The following critera will help judge the quality of the piece, so that I don't forget any important factors. I am maintaining a file (call it a "database" if you like) with all the terrain pieces for easy reference and comparison. I developed the following criteria by doing comparisons of scenery pieces I already have and which I am working on so in a way the system has proven to work in practice.

There are two main categories - design and material - with four subcategories each.

Design
This category deals with factors concerning the style and design of the building.
  • Size: I like properly sized buildings. Of course you can make any 28mm house look big by using 20mm figures, but I'm looking for proper 28-30mm scenery with believable proportions.
  • Style & Detail: This is very important to me because I am very demanding and choosey about this criterion. However, since the level of detail can often be told from sample images before the purchase, it is unlikely that I will be giving a grade lower than 4 here. I will only purchase scenery that I'd grade 4.5 or 5 and this will usually remain and at worst be modified by -0.5 if the piece looks slightly worse in the flesh than expected.
  • Assembly: Can the building be assembled easily? Do the individual parts fit together nicely or do I need to fill gaps with Green Stuff?
  • Interior: If the building has an interior (usually accessible via a removable roof) then that's a plus. Since a modelled interior will usually mean a higher price, I do, however, expect to get a high quality interior if there is an interior - anything else would be frustrating. A lack of interior does not not normally influence the rating in a bad way.

Material
In this category I grade the quality of the material with which the model is cast.
  • Sturdiness: I don't care whether the building is made of resin or some kind of plaster. What I do care about is whether it is sturdy, and if pieces fall off during game play then that is unacceptable.
  • Quality: Bubbles can occur in any material and I hate bubbles. They are not only annoying on themselves but they can cause serious damage to the detail of the surface.
  • Flash: Is there much additional effort required to remove unwanted flash or mold lines? Let's hope not!
  • Paint stickiness: It may depend on whether you have properly washed the model prior to base coating, but some resins really don't like paints and the colour "falls off" like it was antipolar magnetic. So will the colour stick or will you strike the colours?
Note that the model's price is not included in any of the categories. Ideas of what should be an apropriate price for a building varies from gamer to gamer. From my experience most people are not willing to pay a fair price for high quality scenery. So with the opinions (and pain barriers) concerning acceptable prices varying so much I chose to not factor in the costs of the model. It may however slightly influence the overal grade (see below).


Calculating the overall Grade
In order to calculate the total I do the following:
  1. Calculate the mean for each the Design and Material category.
  2. Calcualte the weighted mean of Desin and Material (Design 60%, Material 40%).
  3. Adjust the result by no more than +/-1, based on personal opinion/feeling
The last step allows me to adjust the grade a little to factor in my overall satisfaction based on things that I could not take account of in the categories (e.g. price and shipping costs, packaging, bonus bits that came with the model). Mostly I will be rounding up or down to the nearest full (*.0) or half (*.5) number.


Example: The Coaching Inn (the2legends)
In a recent post I described how I painted the Blue Wolf Inn, a great resin building I got from ebay and wich was previously produced by the2legends. The building was already assembled but still I could assign points and grade the model. Among a few other pieces (some of which I am currently working on) the inn is used as a reference model.

So this is what the scores are (for more comments check out the post about the Blue Wolf Inn):


Yes, that's a lot of top marks but there's no need to deny points when they are well deserved. Praise where praise is due. I am that happy with the model. But I can promise some of the upcoming models will not come off as well. ;)

If you have any thoughts and comments about the review system, feel free to let me know!

Monday, March 9, 2009

The InnFamous Wolf

Of the two rival coaching inns in Gierburg the Blue Wolf is renowned for their fine menu of foods and drinks, every mouthful is more than equal quality to the fare at the Golden Knight, if at more acceptable prices than its rival which prides itself with being the place to cater for more noble and refined palates. If the Blue Wolf is less choosey about its clientale, the better reputation it has received is a price its owner and proprietor is willing to pay.


The Model

The inn is a typical medieval half-timbered house. This highly detailed 32mm resin building was designed by DIMA (thanks to Samy from Gidean-Gelände Forum for this info) and used to be available from the2legends. I was looking for the source of the house for quite some time as I got it from ebay and was interested in knowing who the manufacturer is. The model is not available for sale anymore, however, as I stated above, it used to be and you can still see a gallery entry for it at Grey Funnel Line.

You might notice the striking resemblance to the Warhammer Coaching Inn from ForgeWorld. Also the emblems are from the Mordheim scenery sprue. These are most likely the reasons why the model is not sold any more.

For more photos of the unpainted building have a look at this thread on Tom's Boring Mordheim Forum (ENG) or this thread on the Gidian-Gelände Forum (GER).


Painting the Blue Wolf Inn

Painting the inn has been a real blast. It was easily the most relaxing and satisfying paint job I have done to date. The high detail of the model made painting really easy and I could quickly achieve satisfying results, which was, of course, an immense motivation.

In the following I will give some short describtions of how I painted the individual parts of the house. This is not only a helpful guidance for those who want to paint their own buildings in a similar style - for me this is a necessary reminder of which colours I used so that I can recreate the effects when painting other houses so that I can maintain a degree of consistency when I want to.

I am using Citadel Paints by Games Workshop so all names are referring to those. If you use something different such as Vallejo you will have to "translate" them. There is a very useful Vallejo-Citadel Paints Comparison Guide on the Miniature Wargaming website.

I undercoated the house with black so you could add that as a step 0 to all the painting guides.


Timber
Some may find the colour of the timber too bright as it would probably be more realistic to have a dark brownish almost black to represent the weathering. Well, the Blue Wolf Inn has just been built... in a way... ;)

  1. Drybrush with Scorched Brown
  2. Drybrush with Bestial Brown
  3. Drybrush with Snakebite Leather
  4. Drybrush with Bleached Bone
  5. Carefully drybrush with Skull White
  6. Paint the nails black
  7. Paint small dot of Boltgun Metal


Brickwork

  1. Thorough drybrush with Dark Flesh
  2. Apply one of the following to individual bricks:
    (a) Drybrush with 2/3 Dark Flesh, 1/3 Blazing Orange
    (b) Drybrush with 2/3 Chaos Black, 1/3 Regal Blue (optionally add a bit of Red Gore)
    (c) Drybrush with Bestial Brown
    Note: In order to save colour I continuously add water to the mixtures so that I get more out of them. This results in watered down mixtures, obviously, but that is not a bad thing as it also gives more variance to the bricks even while applying only one of the above three colour combinations.
  3. Carefully drybrush with Bleached Bone
  4. Lastly, add little stains of Codex Grey to a few random bricks


Daub (Wall Filling)
Using highly watered down base colours is key here. After the first coating with Codex Grey you then already have a very irregular wall colour and I was, in fact, considering to leave it at that. But I decided to add brighter colours to give the walls more depth. After the initial grey you have to speckle the colour on the wall to achieve the irregular effect. A bit of colour here, a bit there... Always make sure that there's plenty of the previous layers still visible.

  1. Watered down Codex Grey
  2. Watered down 1/3 Codex Grey, 2/3 Fortress Grey
  3. Watered down Fortress Grey
  4. Watered down 1/3 Bleached Bone, 2/3 Fortress Grey
  5. Watered down 1/2 Bleached Bone, 1/2 Fortress Grey
  6. Carefully drybrush with Bleached Bone


Windows
After painting the entire glass of the window each following layer is a little smaller and in the centre, so the last layer is just a little drybrushing in the middle.
  1. Fill with watered down Regal Blue
  2. Drybrush with increasing mixtures of Shadow Grey
  3. Finish off with Shadow Grey and a little Fortress Grey


Roof
  1. Drybrush with Scorched Brown
  2. Drybrush individual shindles with Dark Flesh
  3. Drybrush individual shindles with 1/2 Scorched Brown, 1/2 Chaos Black
  4. Drybrush with Skull White + tiny bit of Scorched Brown
  5. Carefully drybrush with Skull White

Base
Before painting the house I detached the huge base that had been glued to it. This allows me to place the inn directly on the gaming table when I want to (e.g. in the city) or place it on the base when using it on a more wilderness type of table.

I drybrushed the base with Scorched Brown, Bestial Brown and Skull White mixes. The Stones are Codex Grey and Fortress Grey with a final light drybrush of Skull White.


A little Something Special...

A building like this benefits a lot from additional items and gimmicks. Here is what I did:


Sign
The Blue Wolf sign is from the Mordheim building sprue that came with the Mordheim boxed game. Scenic items that represent wooden structures, such as this sign, which have very fine detail, cannot be simply drybrushed like I did with the inn's timber framework. The wood grain on the sign has to be painted explicitly with fine brush strokes. The colours used, however, are the same.
  1. Drybrush with Scorched Brown
  2. Bestial Brown
  3. Snakebite Leather
  4. Bleached Bone
I drybrushed the metal with Tin Bitz and then a little with Boltgun Metal, leaving some spots in Tin Bitz to create a simple rust effect.

For the wolf itself I used:
  1. Regal Blue
  2. 1/2 Regal Blue, 1/2 Shadow Grey
  3. Shadow Grey
  4. 1/2 Shadow Grey, 1/2 Codex Grey


Drinking Trough
I added a drinking trough I ordered from the2legends. This nice piece was sculpted by Elmar Fischer of Stronghold Terrain.

Sacks, crates, barrels, ...
The sacks and crates are from Antenociti's Workshop. The crates were painted exactly like the inn's timber (sometimes leaving out the Snakebite Leather step for variety). For the sacks I used the following:
  1. Drybrush with Snakebite Leather
  2. Drybrush with Codex Grey
  3. Drybrush with Bleached Bone
  4. Drybrush with Skull White (optionally, for variety)

The bucket and barrel are from Games Workshop, the goods stack (barrel, sack, crates) is from Pardulon.
Flowers
It was very important to me to use some additional "planting" to make the model more realistic. It adds a great "diorama feel" to the scenery. I was looking for suitable flowers and finally chose to try the flowers from Silhouette that I ordered as a set from Menta-Modellbau. They are also (individually) available from the Max Paint Shop or Battlefield Berlin.

Although they are meant for 1/87 scale models I am very content with them. They are perfect for 30mm scenery.


Lastly I wanted to add some ivy to the wall. After a little research I found that you can either use miniNatur's ivy (available from Max Paint, Grey Funnel Line, Microconstruct, Battlefield Berlin) or etched brass (dt. "Foto-Ätzteile") from g-modell (some of them also available from Max Paint). The latter are far more expensive so I opted for the miniNatur product. To save shipping I waited a couple of weeks until the Hamburger Tactica 2009, because I knew that Grey Funnel Line was attending the show so I could just buy it directly there.


Stable
The Warhammer Stable from ForgeWorld's Warhammer terrain range is the perfect addition for the inn. As I write these lines the building is lying next to me because I just received my package of ForgeWorld terrain this morning. Look out for a review on their Warhammer houses coming soon here on the blog (update: here it is :).


The finished Blue Wolf Inn

Click on the pictures to view them in original size.


I hope you enjoyed this first building of my new gaming table. In the pictures above the inn is obviously not in its proper setting yet as this is the first piece of many for the table so the terrain you can see is from my EiF/BTB Mordheim board. There is much more to follow so you will be able to watch Gierburg grow with each new piece and the next building is already in the works...

Update:
I am happy to see other people find this tutorial helpful. Check out these works:

Update Jan 8th, 2016: I am aware that many links in this post have become broken over time. I will leave most of them in for reference, sometimes adjust them to point to the main domain where the deep link to a specific product has become outdated.


Sunday, March 1, 2009

Hamburger Tactica 2009


On February 28th and March 1st the Hamburger Tactica 2009 wargaming convention was taking place in Hamburg, Germany. I went there on Saturday with two fellow Pirates from my weekly Legends of the High Seas gaming group, Jens and Peter.

There were tons of gaming boards with amazing scenery, display miniatures and shops that offered everything a tabletop gamer could wish for. There was so much eye candy that I felt like gaining a pound with every new showcase and board I came across. I was delightfully surprised to see Foundry Pirates by Tom Weiss displayed among many other superbly painted miniatures.


Amongst the most impressive scenery pieces was undoubtedly the gigantic Elven Port by Wolfgang Jädtke (of Mordheim board fame, amongst other amazing works). I had seen photos of the port before and it was great seeing it in reality. You can see more photos of this beauty on Gidian-Gelände.


Another diorama that really stood out to me was Frank Bauer's medieval joust scene:


My favourite gaming board at this year's Tactica was Rux' stunning Tortuga Island, where stunning games of Legends of the High Seas were held. I saw the board at last year's Tactica, where it was used for Legends of the Old West. It was already incredible then but the port section was missing and this time it was even more spectecular. You can see lots of photos of the table from the 2007 Tactica here.


The Games

The first game we played was from the amazing "Oh, wie schön ist Panama!" set-up held by the "Kurpfalz Feldherrn". They had three tables dealing with Henry Morgan's assault on Panama in January 1671. The outcomes of the two smirmish scenarios (one of them also using the Legends of the High Seas rules) could affect the large 15mm battle (Crusader rules) on the third table. We played one of the skirmishes (not the LotHS one, because we already play that every week), which was a mix of role-playing and mini skirmish, designed and excellently game-mastered by "Wraith" (of the Sweetwater Forum). He explained to us that he originally wrote the rules for the gangster era but they were easy to ammend to the swashbuckling setting.

Each of us controlled one pirate figure and our mission was to gather information on the whereabouts of one of the enemy's captains so Morgan would have an advantage in the battle on the other table. The gathering of information was abstracted to collecting cards and the first to have a full house or flush would win the game. If we failed to achieve this within 8 turns we'd all lose the game. So we quickly went to talk to the townsfolk of the little seaport. Peter was threatening a noble Lady just to get his ass whiped by her swashbuckling fiancé and later he was pushed from the docks into the muddy water by a longshoreman. Jens went straight to the tavern - probably a reflex ;P We all had our ears talked off by a zealous priest and tried our luck at the brothel.

Despite quite a number of cards drawn we failed to accumulate a winning hand and it looked as if we were all going to fail our mission, when, in the last turn, I found the missing piece of the puzzle in the treasure chest of the tavern's guestroom (which Jens ironically opened for me after stealing the keys from the barmaid, but he was busy duelling the upset inhabitant who had been... "talking" to a, uhm, lady when the door was opened). So I got to draw two more cards and won with 3x Joker, 2x Queen.


We all had a real blast playing this scenario. Capt'n Morgan was generous and awarded me with an extra ration of his finest rum for my victory:


The second (and last) game we played was a slightly amended version of the Pit Fighter rules from issues 1 to 3 of Games Workshop's short-lived "Fanatic Magazine". The rules used to be available on the Specialist Games website, which was taken down recently. If you are interested, you can still get the PDFs from the files section of the Mordheim Yahoo group, though.

This game was a 6-way with one gladiator per player. The game lasted for around two hours which was quite exhausting for all of us (more so probably for Jens who managed to die very early on). Maybe we were too many people, but it was definately also due to lots of 1s we rolled in critical situations where a 2+ would have meant the death of an enemy.

Nevertheless, the game was really fun. I had always wanted to play the game because it seemed quite interesting from reading the rules in Fanatic Magazine. I was fourth to leave the game, closely missing the grand finale. I think I will build some kind of simple arena some time in the near future and paint up some gadiators (I have a bunch of Foundry ones burried in my lead mountain). This is a really cool game system, ideal for spending an evening with friends and having some board game fun.


The Purchases

I had made a list of things I was going to look for and I didn't bring much more money than I would need. Anything else would spell bankruptcy for me on such an event.

I had pre-ordered a few things at MiniaturicuM as they had a considerable discount on pre-ordered stuff. This allowed me to get the Old Glory Brigantine for less than I would pay if I ordered it directly from Old Glory UK. An opportunity too good to pass, especially since my pirate crew is still waiting for a proper vessel.
I also purchased a copy of the Gloire rulebook. I have been wanting to try these rules for quite some time and I have only heard the greatest of praises concerning Rattrap's products so far so I figured it was time to check it out.


Battlefield Berlin was offering a 15% discount on all pre-ordered products so I took the opportunity to acquire some miniatures for my Gierburg project.
I have been wanting to acquire the incredible Assassins from Freebooter Miniatures ever since I first saw them. They are really awesome sculpts with a very unique style. Browsing Battlefield's online shop I came across the range of a small company called CustomMadeMinis. I really liked their rogue model, which will be great as one of the less reputable characters for my Gierburg project. Lastly, Battlefield was having a special 50% discount on Rackham's Cadwallon range. Althoug the miniatures are on the larger side the Cadwallon Militia box was too tempting to not add it to my pre-order.


And as always I couldn't resist stopping by the stand of Pardulon and buying a bunch of useful bits. I had wanted to buy their cellar entrance buy sadly they didn't have any left.


Lastly (and indeed certainly not least) I stopped by the stand of Grey Funnel Line. I had been waiting to buy miniNatur ivy for weeks so I was glad to finally acquire it. It is what I need to put the finishing touches on my first Gierburg house so I am glad that I will now be able to complete that one.


The Highlight

Those of you who frequent the Gidian-Gelände Forum will know that Wolfgang (see Elven Port above) is working on a new Imperial City board. This means that he doesn't need his old Imperial Village anymore and I, well, I volunteered to help him get rid of it :)

Unfortunately Wolfgang couldn't make it to the show so I was given this huge package and bag by the organizers:


When set up (on my kitchen table), the remains of Wolfgang's village look like this:


Check out this tavern with removable roof and floor:


Many many thanks to Wolfgang for giving this cool board and the houses away (for free!). I very much look forward to restoring this terrain and making it a full-fledged gaming board again .


The Aftermath

There were many more very impressive gaming tables at the show and I took very few photos. There will be more photos up soon on the Hamburger Tactica homepage, so look out for that!

With all these new acquisitions I made I will have enough to do for the next couple of weeks. The first thing I will do is finish the Blue Wolf Inn, the first building for my Gierburg table. Then I will tend to the Brigantine. I can't wait to have my pirates sail the seven seas on that vessel.

Finally, I have to say thank you to Jens and Peter for coming with me to the Tactica, and especially to Peter for chauffeuring us, as I have no idea how I should have taken all this stuff home by train.

It was a great day and I hope I will be able to make it to the next Tactica in 2010!


EDIT: For more pictures check out the Tactica galleries of Unfinished Armies, Westfalia Chris and Thorbjørn Nielsen (of Lead Adventure Forum).