Friday, June 26, 2009

Roadside Shrine

When I ordered the drinking trough for the Blue Wolf Inn from the2legends a couple of months ago, I also ordered this roadside shrine. Now I finally got around to assembling and painting it.

The shrine is a nicely designed four piece resin kit:

The kit unassembled and assembled

There are two issues I have with the model, though. Firstly, the back of the shrine isn't modelled, it's just a blank back (like what you usually see on the bottom of a resin base/model). This wouldn't be that bad, if it weren't for the bricks on the right side of the shrine, which are touching the back and creating an unnatural looking edge. It's just a minor critique but a shame nonetheless.

Far more annoying are the bubbles in the resin. Funnily there are no bubbles in the shrine or in the huge stones. But the small stones on the ground have suffered heavily from the bubbles. You can see it in the photo below.

Close up on the air bubbles

Honestly, I don't mind the bubbles that much. Of all possible parts the small stones are definaltey the best for them. On the table you will hardly take notice of them unless you know they are there.

Aside from these two things I am pretty happy with the model. It paints up very nicely and I am rather satisfied with how the weathering on the shrine turned out. All in all a recommendable model. Well worth the investment if you enjoy painting small models on a late evening with quick rewarding results.


And now, last but not least, for some photos of the painted model:


Tuesday, June 16, 2009

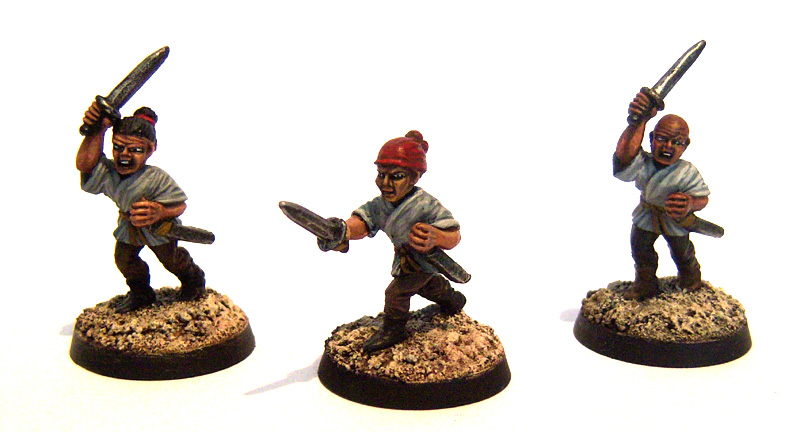
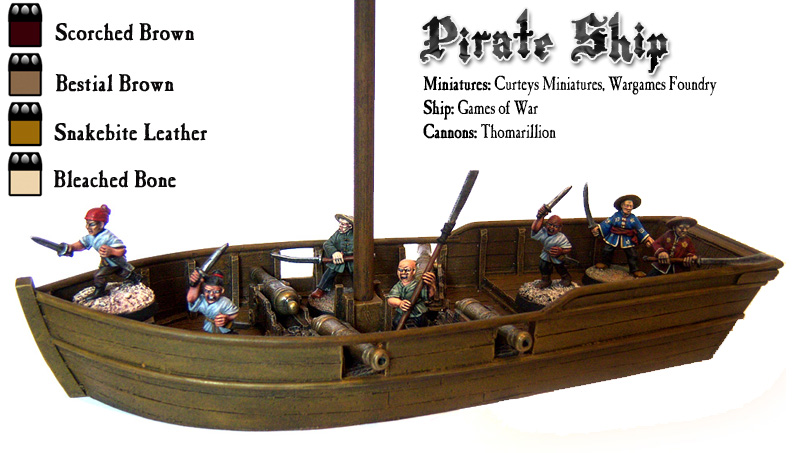
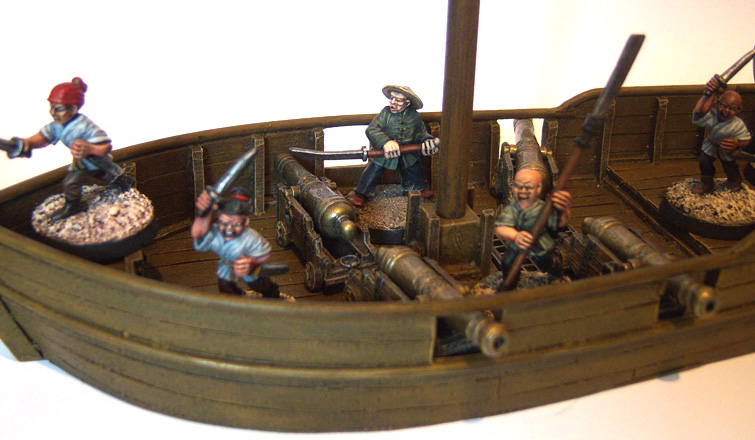
The Sea Dragons Part 2: Painted Pirates


After part 1 about collecting the Foundry/Crusader figures for my Chinese pirate crew, the Sea Dragons, let's have a look at a few painted ones now.

I actually wanted to post these earlier (a lot earlier!) but I recently focused on painting terrain and scenery for my Gierburg project so these fellows were pushed back over and over again.

The Mates (Foundry)

Pirate Rogues (Curteys Miniatures)


For some reason I'm having problems painting the Foundry pirates while the Curteys on the other hand paint up rather nicely. Maybe I just forgot to paint minis after all the recent scenery.

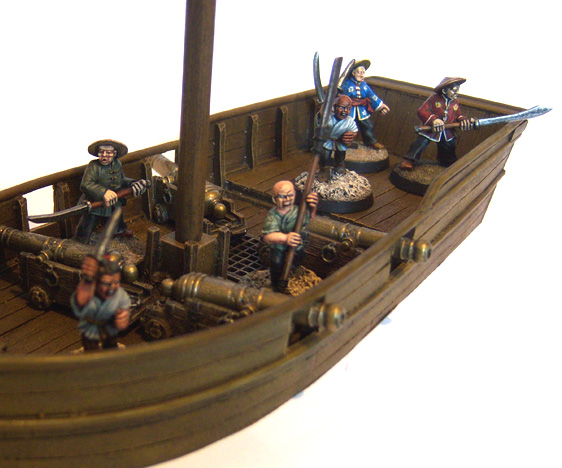
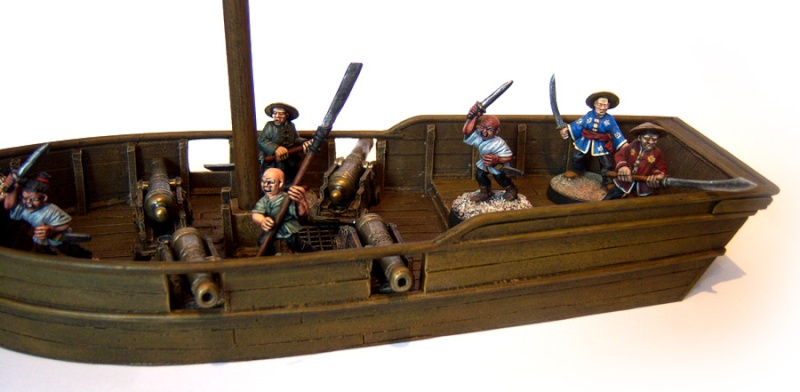
Below you can see a few photos of some of the Sea Dragons in my first ship, the "Sea Dog" by Games of War. This ship is more apropriate for Redbeard's Sea Dogs and I hope I will get to purchase a proper Chinese vessel for this crew soon. I will talk about my entire shipyard in more detail in a future post.


Sunday, June 7, 2009

All's Well that Hath Well

As the post title's little alteration of Shakespeare's classic phrase suggests, a well is a sort of must-have item for a medieval/fantasy gaming table. I ordered the Warhammer Well from Forge World along with some other scenery.

Just as with the recent bloomery there is not much to say about the well. It is a nice model that was fun to paint - absolutely recommendable. Personally, I would have loved to see the well itself being removable from the base so that it could be placed on a flagstone area or something. But that's not really a big disadvantage and to most other gamers this will probably not matter - on the contrary, they might be grateful for the additional modelled ground.


Monday, June 1, 2009

In full Bloom

I have finished another piece of scenery for my Gierburg table: the Warhammer Bloomery from Forge World. This review is rather short because there is very little to say other than that this is a fine detailed piece that I like a lot. It's a huge plus for me that this is a rather unconventional piece. You'll see houses from dozens of manufacturers, but a bloomery, that's really something special. And as usual Forge World live up to the quality that they are known for.

My only critique is that in the model I got, a tiny part of the hinge joint of the lever was missing/broken off (the bit left of the lever's anchor which is meant to hold the axis). I only realised this when I wanted to glue the lever on. It was no big deal as I could easily model the piece with Green Stuff, but still it was a bit disappointing and people who are completely unfamiliar with modelling putty would have probably been quite frustrated. I don't believe this to be a common deficiency, yet I found it noteworthy.

Aside from that I am totally happy with the model and I can fully recommend it. It's a great stylish addition to any medieval fantasy/historical gaming table.


And now for some pictures of the finished piece. I used the same foliage and flowers as for the Blue Wolf Inn and the Stable. I hope you like it. (Click on the images to enlarge them.)

Monday, April 27, 2009

Dead Men Tell No Tales

Big Legends of the High Seas update! First off, the Pirates section has been updated with lots of goodies for the game:

Living FAQ
I have compiled an FAQ with things my group came across in our games. All answers have been confirmed by the book's author Tim Kulinski on the LotHS Yahoo group. If we come across any new issues I will add them to the list (hence the "living").
Update: The FAQ has been updated and is now also available directly from the Warhammer Historical website.
Update 24-09-2012: FAQ is now available from this blog as Warhammer Historical is no more.

Random Happenings
In my gaming group we have been using a set of random happenings for some time now. I wrote these rules based on the Random Happenings article by Mark Havener and Tim Huckelbery which was first published in White Dwarf 240. Many thanks to my gaming group for playtesting them and to Stu Cresswell for his invaluable proof-reading.

If you have any feedback on these random happenings feel free to post them on the LotHS Yahoo group or just leave me a comment here.

Scenario: Dock Raid
This is a little scenario we have recently played in our group. Try it if you like!

Scenario: Mine
Another new scenario. Well, not that new actually. I originally wrote the scenario ("Horrors of the Underground") for the Mordheim supplement Border Town Burning and built some special tunnel tiles for it. Since the scenario is so much fun and Jens from my LotHS gaming group wanted to play on the tiles, I adapted the scenario to the pirates setting. So if you enjoy playing something different, try the scenario. There are templates for you to print off in case you don't want to start building your own mine. :)

Here are some (admittedly sub-par) photos of our session:


Jens deploys his Crew in the centre of the set-up and explores the tunnels from there.


I am the attacker and start at the tunnel entrance.


Steadily I move towards the opposing pirates.


In the meantime Jens' pirates are fighting off wolves (represented by Mordheim Chaos Warhounds, ehem..) and the angry bear (represented by a panda bear for BTB).


New Releases
Black Cat Bases had a ship on their workbench for ages (or so it seemed), but when browsing photos of Salute at gioconomicon.com, I saw a photo depicting resin casts of the model. So I contacted BCB about the ship and they said it would be out soon. Well, it still is not, but we can hope, right? In case the model looks familiar: you might have noticed the ship model in the Legends of the High Seas book on various pages (28, 41, 44, 46, 48 and 88).


Another ship that some people have been waiting for for a long time is the medium ship from Games of War. Despite promises that the ship will be out soon it still is not. At least someone seems to have seen it in reality at their store so it may come eventually...

Lastly, Sailpower have recently released a 28mm Great Sloop that looks really great.

So much for ships. Crusader have added a new Pirate Crew pack to their Pirates range and I'm still waiting for Black Tree Design to release the pirate miniatures range.

That's it for now. Happy treasure hunting!

Friday, April 10, 2009

Interview with Tabletop World

Tabletop World is a new company that specializes on making properly sized 28mm tabletop scenery. Especially noteworthy are their authentic looking buildings which they create in a very unique way. As you may know I'm a scenery buff, an addict for high quality buildings (I'm speaking of Forge World kind of quality). So when I first saw some of their stuff on CoolMiniOrNot and their photobucket account I became a fan immediately. On the occasion of the launch of their website and online store I had the idea of making an interview where they could explain how they do their terrain. Luckily Mladen and Ivan of Tabletop World agreed to answer some questions.


cianty: First off, thank you for taking the time to do this.

TW: No problem, thank you for asking us.

cianty: So you have a very unique way of creating your models. Can you explain how you go about it?

TW: Well, the thing is, no matter how hard we tried, we couldn't find any realistic stone work on the market. No one uses real stones for making walls. It's always carved in some way, which often looks very good, but there is a small problem with realism. In our opinion, the only way to create a realistic wall is by doing it the same way it is done in real life. Making stone blocks and using them to create walls. That was the main reason we started creating miniature buildings. We really hope the public appreciates the effort behind it. When combining these stone walls with different materials like wood and plaster, with a little bit of creativity and passion for the fantasy world and its atmosphere, we came out with several life-like medieval buildings. We hope that they will spice up many tabletop battles around the world.

cianty: The buildings certainly do look amazing. How long does it take to make one building this way?

TW: We started to create buildings one year ago, and we have created only three of them so far. So it takes about four months for a single building to be completed, molded, casted and painted to be ready for presentation. So it's a lot of work and investments - like building material, all the tools, molding rubber, resin... - but we enjoy it and would have done it anyway, so why not try to offer it to the public.

cianty: Yes, it's great that you cast those models so others - like me - can benefit from your efforts. I really like the authentic look of the houses. Not only the stones but their overall structures. Do you use any particular reference material when designing a building? What is your inspiration?

TW: We're not using any references really. We get the ideas from some movies or forum discussions and put a few general guidelines on the paper. After that we simply start to build and the ideas come by themselves. We do what looks good in general. The latest building, the blacksmith's forge, started as a small shed with a chimney, and ended up as a quite big medieval buiding.

cianty: I love that building. On the 'what you get' photos I saw that the forge and the medieval inn each come with a miniature. There's a female inn keeper figure for the inn and a blacksmith figure for the forge. That's a really nice bonus. Will you continue to provide such extras? Have you any plans on producing a separate miniatures range to go with the scenery?

TW: Anybody who tried to model, mold and cast miniatures knows that they are very difficult to create. All those little pieces requires small two piece molds, and when casting, it often traps air bubbles in the face or finger region, so two out of three casts are unusable. It makes them hard and time consuming to cast. But they do make a building look realistic and make for a great size reference. We will definitely continue to make minis. We hope that this bonus to the buildings will turn a few heads towards our shop. As for the separate miniatures range, we don't plan that in the near future.

cianty: What material do you use exactly for casting the models - hard plaster, resin?

TW: We tried many materials and the conclusion was that the urethane resin from Smooth-On company (US) is the best choice. Low density when casting allows it to capture all the details, and hardness and rigidness when dry makes it a good material for the finished product. It's a bit expensive, but well worth it.


cianty: Can you tell us what buildings you have planned for the future?

TW: We don't know yet. Depends on the market. There are a few ideas like a couple of small town houses, wind or water mill, maybe a Mordheim ruin, but it will depend on what people want the most.

cianty: So you could be influenced by people sending you email requests for certain buildings?

TW: Not only that. We could be influenced by mails and forum comments, we love when people throw their ideas at us. It's like a free market research for us. That way we know what are the best projects for the future. And, of course, our biggest indicator on what to build next is what sells best.

cianty: Some companies such as Forge World or Resina Planet have buildings with a modelled interior in their ranges. Is this something you will consider for the future?

TW: We are thinking about it, and probably we'll do that. It makes the whole building more usable and therefore more interesting. One of the ideas was to create interior walls that can be fitted to any building already made. That's definitely something we will consider.

cianty: That sounds very interesting. I'd love to see that.

Your painted samples of the buildings are beautiful. Will you consider writing tutorials on how you paint the stones and wood? That fire in the forge also looks really great with the light reflecting on the stones.

TW: Thank you, the thing is the paint job does take much time and effort, so that's why there are two of us. We would be more than glad to share our experience on painting different materials with anyone who has interest in it.

cianty: Great! I think I will get back to you about that.

Alright, that it! Thank for your time and good luck with your new shop!

TW: No problem. Thank you for the interest.

Friday, March 27, 2009

The Stable


Review: Warhammer Stable

ForgeWorld's Warhammer terrain range offers some of the best medieval fantasy scenery on the market. I had been drooling over the photos on their website for long enough until I decided to place an order. In this post I document my impressions and experience with the first ForgeWorld piece that I assembled and painted for my Gierburg table: the Warhammer Stable.1

I have to say that I am not a few of Games Workshop's latest Empire terrain for Warhammer. It undoubtedly has a distinct style but personally I am not a fan of all the Sigmar comet symbols, skulls and other falderal. I have always loved Forge World's scenery, however, because of its more authentic historical feel.

After painting the first building for my Gierburg project, the Blue Wolf Inn, I decided it was time to get my hands on the Forge World buildings at last. The stable is a great addition to the inn (and easy to assemble) so I did that one first.

Contents
  • Main building
  • Roof
  • Beam
  • Wheel sprue with 2x 2 wheels
As you can see, aside from the beam which needs to be glued on the base, there is no further assembly required. A little filing off of some surplus resin and that's it. Well, if it weren't for two enormous chunks of resin at the bottom of the base (unfortunately I didn't take photos of them). It took a while to cut/file/rasp them off and it was rather exhausting, especially as I accidentally drove the building in my right thumb twice in the process, soaking the stable with blood even before it saw its first battle.


First Impression
These were my first impressions:
  • Larger than expected: Buildings tend to be smaller than you want them to be and this one was a nice surprise.
  • Great detail: The detailed stones in the walls and the structured wood are nicely done.
  • Lovely additional bits (on the model): There are two barrels, a bucket, a hay stack and hay spread inside the stable. That's some very nice extra detail that surely cannot be taken for granted.

Design
For this review I will grade the model as I described recently in the introduction of the Wrecking Ball Terrain Review article.
After the Blue Wolf Inn and the Burgomeister's Mansion (coming soon) I was somewhat apt to give a lower grade here. Surely a stable cannot compete with a huge inn or mansion in terms of impressiveness. But it doesn't have to and such a comparison would not be fair. It is a stable - that is what it is meant to represent, so it should be judged on that.

The stable is very nicely modelled: the detailed walls are sculpted on the in- and outside, the wood has a good structure, the roof sits nicely on the building and additional items such as two barrels, a bucket and a haystack round off the model. While it is great to have these items on the model it would have been better if they were removable. Especially the barrels get in the way of the brush when painting. Well, can't have everything, right? Ultimately, however, it is, of course, better to have these items than not at all.


Conclusion
The stable is a great building that comes at a very fair price (thanks to the current high of the Euro). The detail is pretty much perfect. The only deficits are the quality of the material. The resin itself is sturdy but at some places the paint won't stick (despite having washed the building prior to undercoating). Fortunately this was mostly only at the walls where the gray resin can be drybrushed to look like stone. These are only minor points though, and all in all the stable is nearly perfect: 4.5 of 5.


Painting the Stable
I really enjoyed painting the Warhammer stable. The roof and (structured) wood paint up nicely and fast so you get some good quick results that motivate further work. A first drybrush of Codex Grey on the stone walls soon gives you a rough idea of what the building will look like in the end. So you can get a great basis to work on after a short time so that you are motivated to go on and spend the extra time on figuring out how to do the stones.


Base/Ground & Roof
See the Blue Wolf Inn for how I painted the base/ground (Scorched Brown, Bestial Brown, Skull White) and the roof - I used the same technique and colours.


Stone Walls
Painting the stone walls took a lot of time. I found it much harder to get satisfying results on stone walls than on brickwork. Simple drybrushing is not sufficient as you need to mix and use a lot of colours and pay a lot of attention to the individual stones. This is pretty time consuming but, in my opinion, well worth the effort.

I tried to write down the steps I went through when painting the stones. I went through some "trial-and-error" but I think I figured it out alright in the end.
  1. Drybrush with 1/2 Codex Grey, 1/2 Chaos Black
  2. Drybrush with Codex Grey
  3. Drybrush individual stones with one of the following:
    • 1/2 Codex Grey, 1/2 Bestial Brown
    • 1/2 Codex Grey, 1/2Vomit Brown
    • Bleached Bone
    • Fortress Grey
  4. Drybrush with Codex Grey (tones down the previous layer)
  5. Drybrush with Fortress Grey
  6. Draw lots of small dots/stains/strokes on individual stones using one of the following:
    • Vomit Brown
    • Bestial Brown
    • Bleached Bone
    • Skull White
  7. Combining these stains creates a nice realistic effect. Mixing the colours and stains should be done in a way that feels right. It takes a lot of time and I could have spent even much more on it.

Vegetation
Again I used the same as for the Blue Wolf Inn: flowers from Silhouette, ivy from miniNatur and foliage from Antenociti's Workshop.


The finished Model
Alright. Enough talk - here are the pictures, enjoy:


_____________________________________
1Unfortunately the stable is currently out of production and not available in Forge World's online store (March 30th, 2010). Let's hope it returns soon!

Related Posts Plugin for WordPress, Blogger...