

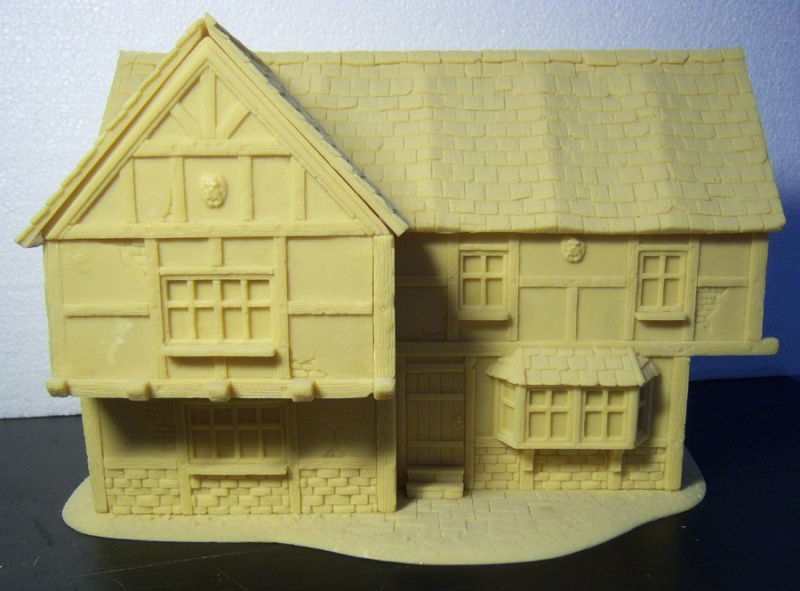
The Model
The inn is a typical medieval half-timbered house. This highly detailed 32mm resin building was designed by DIMA (thanks to Samy from Gidean-Gelände Forum for this info) and used to be available from the2legends. I was looking for the source of the house for quite some time as I got it from ebay and was interested in knowing who the manufacturer is. The model is not available for sale anymore, however, as I stated above, it used to be and you can still see a gallery entry for it at Grey Funnel Line.
You might notice the striking resemblance to the Warhammer Coaching Inn from ForgeWorld. Also the emblems are from the Mordheim scenery sprue. These are most likely the reasons why the model is not sold any more.
For more photos of the unpainted building have a look at this thread on Tom's Boring Mordheim Forum (ENG) or this thread on the Gidian-Gelände Forum (GER).

Painting the Blue Wolf Inn
Painting the inn has been a real blast. It was easily the most relaxing and satisfying paint job I have done to date. The high detail of the model made painting really easy and I could quickly achieve satisfying results, which was, of course, an immense motivation.
In the following I will give some short describtions of how I painted the individual parts of the house. This is not only a helpful guidance for those who want to paint their own buildings in a similar style - for me this is a necessary reminder of which colours I used so that I can recreate the effects when painting other houses so that I can maintain a degree of consistency when I want to.
I am using Citadel Paints by Games Workshop so all names are referring to those. If you use something different such as Vallejo you will have to "translate" them. There is a very useful Vallejo-Citadel Paints Comparison Guide on the Miniature Wargaming website.
I undercoated the house with black so you could add that as a step 0 to all the painting guides.
Timber
Some may find the colour of the timber too bright as it would probably be more realistic to have a dark brownish almost black to represent the weathering. Well, the Blue Wolf Inn has just been built... in a way... ;)
- Drybrush with Scorched Brown
- Drybrush with Bestial Brown
- Drybrush with Snakebite Leather
- Drybrush with Bleached Bone
- Carefully drybrush with Skull White
- Paint the nails black
- Paint small dot of Boltgun Metal
Brickwork
- Thorough drybrush with Dark Flesh
- Apply one of the following to individual bricks:
(a) Drybrush with 2/3 Dark Flesh, 1/3 Blazing Orange
(b) Drybrush with 2/3 Chaos Black, 1/3 Regal Blue (optionally add a bit of Red Gore)
(c) Drybrush with Bestial Brown
Note: In order to save colour I continuously add water to the mixtures so that I get more out of them. This results in watered down mixtures, obviously, but that is not a bad thing as it also gives more variance to the bricks even while applying only one of the above three colour combinations.
- Carefully drybrush with Bleached Bone
- Lastly, add little stains of Codex Grey to a few random bricks

Daub (Wall Filling)
Using highly watered down base colours is key here. After the first coating with Codex Grey you then already have a very irregular wall colour and I was, in fact, considering to leave it at that. But I decided to add brighter colours to give the walls more depth. After the initial grey you have to speckle the colour on the wall to achieve the irregular effect. A bit of colour here, a bit there... Always make sure that there's plenty of the previous layers still visible.
- Watered down Codex Grey
- Watered down 1/3 Codex Grey, 2/3 Fortress Grey
- Watered down Fortress Grey
- Watered down 1/3 Bleached Bone, 2/3 Fortress Grey
- Watered down 1/2 Bleached Bone, 1/2 Fortress Grey
- Carefully drybrush with Bleached Bone

Windows
After painting the entire glass of the window each following layer is a little smaller and in the centre, so the last layer is just a little drybrushing in the middle.
- Fill with watered down Regal Blue
- Drybrush with increasing mixtures of Shadow Grey
- Finish off with Shadow Grey and a little Fortress Grey
Roof
- Drybrush with Scorched Brown
- Drybrush individual shindles with Dark Flesh
- Drybrush individual shindles with 1/2 Scorched Brown, 1/2 Chaos Black
- Drybrush with Skull White + tiny bit of Scorched Brown
- Carefully drybrush with Skull White

Base
Before painting the house I detached the huge base that had been glued to it. This allows me to place the inn directly on the gaming table when I want to (e.g. in the city) or place it on the base when using it on a more wilderness type of table.
I drybrushed the base with Scorched Brown, Bestial Brown and Skull White mixes. The Stones are Codex Grey and Fortress Grey with a final light drybrush of Skull White.


A little Something Special...
A building like this benefits a lot from additional items and gimmicks. Here is what I did:
Sign
The Blue Wolf sign is from the Mordheim building sprue that came with the Mordheim boxed game. Scenic items that represent wooden structures, such as this sign, which have very fine detail, cannot be simply drybrushed like I did with the inn's timber framework. The wood grain on the sign has to be painted explicitly with fine brush strokes. The colours used, however, are the same.
- Drybrush with Scorched Brown
- Bestial Brown
- Snakebite Leather
- Bleached Bone
For the wolf itself I used:
- Regal Blue
- 1/2 Regal Blue, 1/2 Shadow Grey
- Shadow Grey
- 1/2 Shadow Grey, 1/2 Codex Grey

Drinking Trough
I added a drinking trough I ordered from the2legends. This nice piece was sculpted by Elmar Fischer of Stronghold Terrain.

Sacks, crates, barrels, ...
The sacks and crates are from Antenociti's Workshop. The crates were painted exactly like the inn's timber (sometimes leaving out the Snakebite Leather step for variety). For the sacks I used the following:
- Drybrush with Snakebite Leather
- Drybrush with Codex Grey
- Drybrush with Bleached Bone
- Drybrush with Skull White (optionally, for variety)
The bucket and barrel are from Games Workshop, the goods stack (barrel, sack, crates) is from Pardulon.

Flowers
It was very important to me to use some additional "planting" to make the model more realistic. It adds a great "diorama feel" to the scenery. I was looking for suitable flowers and finally chose to try the flowers from Silhouette that I ordered as a set from Menta-Modellbau. They are also (individually) available from the Max Paint Shop or Battlefield Berlin.
Although they are meant for 1/87 scale models I am very content with them. They are perfect for 30mm scenery.


 Lastly I wanted to add some ivy to the wall. After a little research I found that you can either use miniNatur's ivy (available from Max Paint, Grey Funnel Line, Microconstruct, Battlefield Berlin) or etched brass (dt. "Foto-Ätzteile") from g-modell (some of them also available from Max Paint). The latter are far more expensive so I opted for the miniNatur product. To save shipping I waited a couple of weeks until the Hamburger Tactica 2009, because I knew that Grey Funnel Line was attending the show so I could just buy it directly there.
Stable
The Warhammer Stable from ForgeWorld's Warhammer terrain range is the perfect addition for the inn. As I write these lines the building is lying next to me because I just received my package of ForgeWorld terrain this morning. Look out for a review on their Warhammer houses coming soon here on the blog (update: here it is :).
The finished Blue Wolf Inn
Click on the pictures to view them in original size.


I hope you enjoyed this first building of my new gaming table. In the pictures above the inn is obviously not in its proper setting yet as this is the first piece of many for the table so the terrain you can see is from my EiF/BTB Mordheim board. There is much more to follow so you will be able to watch Gierburg grow with each new piece and the next building is already in the works...
Update:
I am happy to see other people find this tutorial helpful. Check out these works:
- City House (Ziterdes) painted by ACE: photos here
- Chapel (GW) painted by Jorisch: photos here
Update Jan 8th, 2016: I am aware that many links in this post have become broken over time. I will leave most of them in for reference, sometimes adjust them to point to the main domain where the deep link to a specific product has become outdated.

Wow! Those bricks are something else. And thanks for the heads-up on DIMA's resin buildings. Do you know who sells them now?
ReplyDeleteI'm a big fan of town dioramas and civilians, so I'll be watching this blog with interest.
Thanks, Andrew! I talked to the guys from the2legends and they did cast and sell it, but they no longer do. In fact, they are pausing business anyways for the time being. I don't think this building will ever be publicly available again. I am very tempted to try the Forge World inn in addition and see what it's like in comparison. But the Tabletop World buildings definately come first.
ReplyDeleteSee you around. :)
I am amazed at the level of detail and precision you managed to get on that house! This is exactly the kind of scene I will try to recreate in Everquest Landmark. Thanks for sharing <3
ReplyDeleteHal <3
Very nice and I particularly appreciated the detailed list of paints used. I might copy that idea in later books.
ReplyDeleteThanks
Tony