Showing posts with label Work in Progress. Show all posts

Saturday, December 26, 2015

Using SketchUp for Gaming Board Building

The free 3D modeling software SketchUp is a great tool for planning tabletop wargame boards and I have started to use it for my own projects.

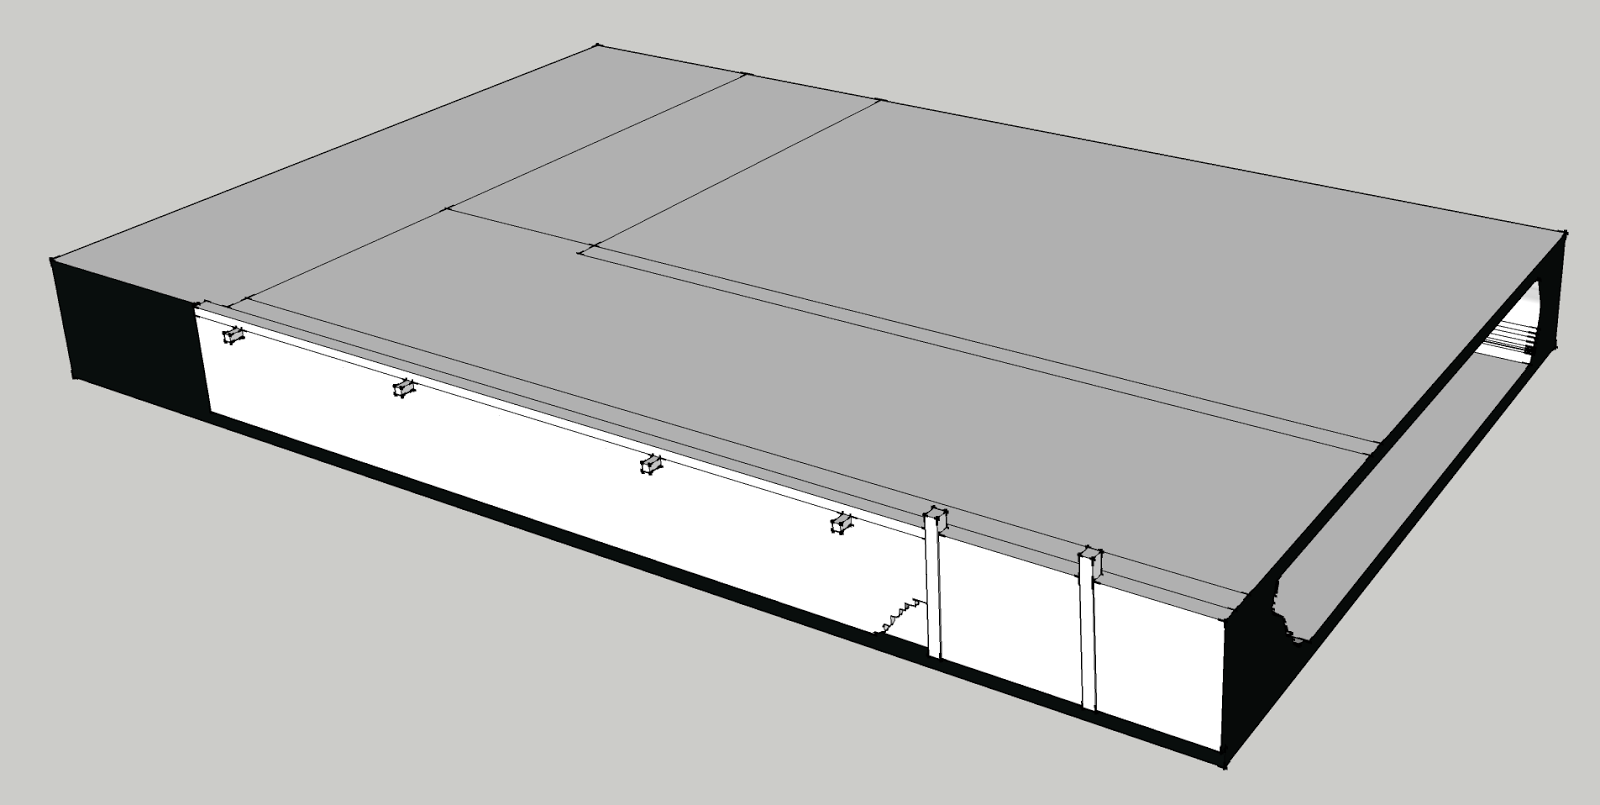
I had a brief look at SketchUp years ago when it first became popular after being acquired by Google. Then, I totally forgot about it until I read a recent blog post by Clarence Harrison over at Quindia Studios. He is building a new game board and uses SketchUp for the early layout work. This seemed super useful and as I have been somewhat stuck with my own gaming board - the Port of Gierburg -  because I am rather clueless as to how to continue with the layout and set-up of buildings and everything, I decided to reproduce my current board in SketchUp. This would give me a good basis to start experimenting with different configurations of buildings, walls and levels.

Workflow and Asset Structure

After a bit of fiddling I quickly settled with a "workflow" and structure for my assets:

  1. Individual terrain pieces such as buildings, board sections, etc. are created and saved in separate files.
  2. Another file is created for the entire gaming board. This is where everything comes together as the individual assets are imported as components.

I found this to be the easiest way of handling things as it allows me to focus on individual pieces and later combine them. This is not so important for the board sections, but if I ever end up with buildings, barricades and other items which are also "movable" in reality, I can try out things in virtual reality. Similar to how you would experiment with different furniture configurations of a room.

The Port of Gierburg in SketchUp

For my Gierburg gaming board this meant that I created the following three pieces (corresponding to their real-life pendants):

The digital version of Dock Section I

The digital version of the current state of Dock Section II

The dock sections put together


To get a better sense of scale I also made two quick sketches of the Town House and Tavern models from Stronghold Terrain. They are particularly well suited because of their simple architectural structure. I only did very rough versions of the buildings without detailed timber-frames, windows, etc. I might spend more time on such details if I am ever in the mood, but for now these models will definitely suffice.

Sketch of the Town House from Stronghold Terrain
Another view of the Town House

Sketch of the Tavern from Stronghold Terrain

The current board with the two houses


Now I have a great basis to try out different things for Dock Section II. I have a couple of ideas and visualizing them like this will hopefully help me make a decision so I can finally continue working on the board. Last but not least, this is also a great way of working on my game board when I am not in the mood or don't have the time to do actual modeling or painting work, yet still want to be a bit productive.


Monday, September 22, 2014

The Port of Gierburg - Part 4: Dock Section II Ground Level WIP

After completing the first section of my Port of Gierburg gaming table it is time to start with the second module. This one will be a lot more difficult and a lot more exciting. Due to its complexity I will handle the (under)ground level first and then tend to the rest later.

Similar to the first module this one is based on a solid 5mm MDF board. Following my initial plans (see Part 1) it measures 45cm x 72cm.

The concept for the port modules with two dock sections encapsulating a water board


Saturday, November 9, 2013

Lazy Forgings...

During the last couple of weeks, over at the Lead Adventure Forum, I have been following this thread by Sangennaru (aka The Lazy Forger) about creating a timbered house structure. The result is incredibly realistic and detailed.

Original master of a timbered wall by the Lazy Forger


Eager to paint up one of those nice pieces I browsed his website and placed an order for some of his cool creations. Check this out!


Modular Resin Roof

The modular resin roof is a very nicely detailed 11,5cm x 13cm piece. With a few of these you can cover large areas and create huge roofs for huge houses. I ordered four of them and I think I'd like even a few more. Useful high quality stuff like this, you can never have enough of!


Little Town

Little Town is a set of tiny houses. I actually do not intend these for any wargaming purposes but for a little board/card game project of mine. These cuties will take the game to the third dimension.


Just looking at them totally sparks my imagination and glad I bought two sets.

Lastly, this bonus stuff that was included is also a testament to the great detail of the quality.


So, I leave with an open appeal to all scenery & terrain producers to buy The Lazy Forger's latest creation and make it available for everyone: A beautiful, finely detailed stable.

Work-in-progress of the timbered stable by Sangennaru (source: LAF)

Update April 6th, 2014: Fenris Games now stocks some of these products as well.

Saturday, September 21, 2013

Sneak Peek: Port of Gierburg

Once again it has been awhile since I last posted something for your viewing pleasure. So to tide you over until the next instalment of the Port of Gierburg here is a small sneak peek:


I am in the process of putting the finishing touches on some crates and stuff and I am working on a little jetty for the ships. As soon as that it done there will be a proper update.


Edit: Wow, I just realized that this is my 150th post on this blog. Considering for how long I am running this and especially when compared to some other blogs this is reeeeally few.

Sunday, June 2, 2013

The Port of Gierburg - Part 2: Dock Section I WIP

In the second part of this series I describe the building of the first big dock section for the Port of Gierburg gaming table.

Building the Docks

With the water board finished work on the Port of Gierburg continues with the first dock section. Basically this section will consist of three sets of harbour walls from GrandManner that I bought some time ago. Each set consists of various resin parts: a wall piece, a jetty, stairs and a flagstone board.
The Harbour wall/jetty
from the GrandManner online store (ME64)

Following my plans for the port set-up (see Part 1) the first dock section measures 75 x 12 cm. The harbour walls have a width of 31 cm so I had to do some filing to get them in the right sizes. Unfortunately (in this case!) the resin that GrandManner uses to cast their pieces is rock solid so it took me really long to file through the walls.


The plan was to incorporate two stairs and one jetty into the dock. I filed off the lower steps of the stairs so that they would fit nicely next to the jetty. The jetty also had to be cut to size. I could have used the jetty in full length, of course, but I want to be able to place three ships in the port and I have certain plans for additional jetties. This required the jetty section here to be rather short.


Like with the water board I used a 5 mm MDF board as a base. The rest was a lot of styrofoam.


I glued a beech moulding strip to the bottom where the dock would touch the water board. To stabilize the sides and to prevent them from damage I used thin wood boards.


I filed the corners of the wood boards so that they matched the stonework pattern of the harbour walls. Later, I would use modelling putty to fill the gaps and create a smooth surface.


Instead of the flagstone boards that come with the harbour walls I decided to use cobblestone boards from Vampisol. As I described in an earlier review these are very nice plaster boards that I highly recommend. I chose to use them over the resin flagstone pieces because the thin plaster boards can be easily cut into shapes so that they can be combined to create a big seamless surface.

Plaster boards with stretcher bond pattern from Vampisol


The Vampisol boards come with an extra pack of plaster powder to fill any remaining gaps after gluing the boards next to each other. I used both the plaster and fine sand to fill the gaps. I also placed some sand on various spots on the overall surface for a more realistic and less clean look. The last thing was to model the corners of the stonework and a step on each of the two stairs with modelling putty.


My focus during the entire process, or let's call it the "big goal", was to create one big piece that looks and feels like one coherent piece of terrain. I really don't like how terrain built with HirstArts products always looks like assembled Lego bricks. So it was important to me that the various walls, stairs, jetty and cobblestone boards all contributed to the appearance of one sensible piece of terrain.

The dock section in its entirety before undercoating


Lessons learned

It is important to put some heavy books on the sheets of styrofoam every time you apply the white glue. There was one moment - after I had already glued a few layers of styrofoam - where the entire thing started to bend heavily. I immediately placed my standard pile of books on it. At that point I had thought that the piece was sufficiently stabilized since there were already various layers, but, no, it bent. Luckily I noticed this in time and when the white glue was fully dried the docks were straight again. Still, don't trust these materials! All in all it took extremely long with daily cutting and gluing and nightly drying.

I also learned that it is impossible to build an accurate "block" by gluing sheets of styrofoam on top of each other. After a few layers you're always off by a few millimeters and I don't get better. For the second dock section - which will be a lot bigger too - I will use not only an MDF board as a base but also use one to maintain the correct measures for the upper layers. This is mainly important for the moulding sheets I like to glue to the sides.


So after all these days of slow building and waiting I'm finally done and ready to paint this sucker, now guess what - I ran out of undercoat spray and so did my local hobby store. His order of new spray paint is already over a week overdue. :/


Coming next in part 3: Dock Section I - Painted


Sunday, May 19, 2013

The Port of Gierburg - Part 1: A Water Board

For years now I have been collecting and painting high quality resin buildings for some kind of medieval/fantasy gaming board. Now the project is taking shape and I have begun working on The Port of Gierburg. This first part describes how I made a water section usable not only for the port but also for piratey boarding actions.

Foreword

Water effects are one of the more difficult techniques it seems. I have read a lot about all types of water effects for tabletop/modelling. There's a lot of talk about different resins, bubbles, stink, bending and breaking, etc. etc. Stu's reports did not neccessarily motivate me to tackle the issue either, despite the results looking great.
Because of all this uncertainty and difficulty regarding the water issue I kept on procrastinating for years. Then, recently, at a local artist supplies store here in Berlin (Modulor) I found a product called "Seefolie" (German, meaning "sea film" or "sea foil"), a water effect film by HEKI (3110 / Seefolie). It finally gave me an idea of how I could tackle the port section and so I got to work...

Measurements

One sheet of sea foil is declared to measure 80 x 35 cm, but the edges are not perfectly cut so I had to manually cut the sheets in size. With these size constraints in mind I decided to start the project with one half of the typical wargaming board size of 4' x 4' (4' x 6' for bigger army games). So the port would take up an area of 120 x 60 cm. As I wanted to use as much of the sea foil as possible to fit three ships next to each other I divided the length of 120 cm up into two sections: a water section of 75 cm and one section for the docks with the remaining 45cm (both 60 cm wide).

Initially I planned the second 120 x 60 cm half of the board to incorporate the neccessary dock features such as as the walls on the edge and starirs leading down to the water. I then realized that I wouldn't want to dedicate such a huge part of the gaming board to the port. So I went with a more modular approach instead using two special 12 cm wide connector sections. They would allow me to again treat both the water board, the big 45 x 60 docks section as well as the big 120 x 60 main city board as independent sections that are connected by the docks.

First concept of the modules: Two 12cm wide "connector" pieces (Dock I and Extra) are placed between one half of the gaming board - the city section (imagine that at the top) - and another half comprising of the water board and a dock section (II)

Again realization struck: The Dock Section II would be a fully dedicated board with no possibility for re-use in a different set-up. Therefore the Extra section did not make much sense at all. This made me end up with the following more straight-forward approach for the modules.

The final concept for the port modules with two dock sections encapsulating the water board


Of course I could have just created one big port piece. But it was important to me to make the water section an independet piece. Like with the board as a whole I had multiple purposes for the water section in mind. Firstly, it is part of the port. But it can also function as a mini board for boarding action scenarios or other special set-ups in nautically themed games - I'm thinking pirates, of course!

Assembling the Board

My first attempt was using a 15 mm thick piece of Kapa cardboard. Unfortunately, after hand-painting it with a first layer of black, the board started to bend and became simply unusable. After reading this post by Mathias Horn (aka Samy) about his current Behind Omaha gaming board I decided to try MDF board as a base. On top of a 5 mm MDF board I glued a Selitron foam board using wood glue.

MDF board with Selitron foam board form the base of the water board


To prevent the edges - especially the corners - of the board from damage (and for better looks) I bought four cheap beech moulding strips, sized 2 x 10 x 1000 mm.

After everything was glued together it was painting next. Browsing the modulor webshop I found a spray colour that is suitable for styrofoam and other foam boards: Aero Design from Union Chemie GmbH. My very first terrain piece was a phallus shaped herdstone for my Warhammer Beastmen army. At that time there was no internet knowledge let alone any experience so I basecoated the styrofoam piece with standard Citadel spray colour - just to see it melt away. Since that moment I am extra cautious when it comes to colouring anything foam-based. So I bought one spray can and tested it on a small piece of Selitron. And: Lo and behold! It works.


The board after applying the first can
of bluegreen Aero Design

Aero Design spray cans:
suitable for styrofoam and other foams
In total I used up three 150ml spray cans to completely cover the board - not exactly a cheap solution but compared to hand painting it saves a lot of time. Plus, similar to air brushing you can achieve very nice effects. I used two different colours: A lighter petrol bluegreen and a dark blue. This allows to create a feeling of depth by having lighter and darker areas on the board. However, this effect is somewhat negated later when appliying the sea foil, which is not 100% transparent. When working with proper transparent resin for water this would be more effective.

Lastly I glued the sea foil on the board with superglue. Anticipating that the superglue would turn at least slightly white when hardened I spread the glue in lines so that they would create the impression of waves. Had I gone zigzag this would look very bad now.

Vallejo Foam & Snow
Looking for a way to create a nice wave effect I came across Vallejo's Foam & Snow product. A quick research on the internet brought up some positive reactions I ordered one bottle. I used it on my test piece and - even after it had completely dried - I was very surprised: The "foam" and "snow" effect little more than plain white colour. I don't know if I am using it wrong, but from what I can see this stuff is completely useless. I expected it to be of a harder consistency and being somewhat translucent when dry. I don't think I could tell the difference between this and plain white PLAKA colours.

The test piece with "foam" on the sea foil


However, I didn't want to give up on the waves. Since some of the dried superglue was already shining through the transparent sea film I made the bold move to apply more superglue - on top of the film. I only did a few experimental lines. You can see the result in the photos below.


The finished water board in its entirety

Close up of the water board. You can see the foil and lines of glue.


Afterword

As a final verdict, I have very mixed feelings towards the sea foil. On one hand, it does create a surprisingly good looking effect and it is really easy to work with. On the other hand, the effect is not quite up to the standard that I try to achieve with how I paint my buildings and the rest of the board. This makes it even more important that I went with the modular approach. At some point I will definately get my hands all dirty and try the expensive and stinky resins which create the perfect water effect. Until then this board is what I need to keep going with building the port section. So for the moment it is probably just the right thing.

The most impotant lesson learned: Try out your materials before working with the final pieces. There were so many throwbacks and frustrations during the creation of this rather simple board, it is astounding.
  • The bending Kapa board was a waste in the end
  • The sea film wasn't properly cut so I had to manually cut it to shape. Unfortunately at that point I had already assumed that the declared sizes would fit and made my preparations for that, wrong, measures.
  • The sea film can be cut with a cutting knife but it's hard to achieve perfect results. Also, if you need two sheets for your water section (like me) the edge between the two sheets is somewhat annoying.
  • The Aero Design products were a positive surprise as I wasn't aware of foam friendly spray before. Unfortunately they run out very quickly and I had to buy another can twice, ending up with three cans for this not that huge water section.
  • At first I guessed the height of the board so the first four moulding strips I bought were 15mm wide - but I needed only 10 mm.
  • Vallejo Foam effect is utterly useless.
I feel like I even forgot one or two things. There were points where I just wanted to finish the damned thing. It definately wasn't that much fun. But now that it's done, it's okay. And it is fun to work on the surrounding dock sections of the port. So in the end it still was worth it.


Coming next in part 2: Dock Section I.


Sunday, April 28, 2013

WIP: Water boarding

A little work-in-progress of my water board section for both pirate action and the port of Gierburg...


Friday, September 28, 2012

New Ships from Games of War coming soon

 Ahoy mateys!

Alan of Games of War has sent me a sneak peek of their work in progress ship models for their 28mm Pirate Supplies range. Their out of stock Sea Prince (see photo for reference) is currently undergoing a re-vamp. The white ship you can see in the back of the photo is a mock-up of the new version of a large ship. In addition, they are also working on a new small ship.


Work in progress of upcoming small, medium and large ship models by Games of War

The new Sea Prince will be available soon. As for the other ships "We are hopefully going to have these available for Christmas", says Alan.

Check out the Games of War pirate range!

The current version of the medium sized Sea Prince

Wednesday, September 26, 2012

Work in Progress: Townhouse by Stronghold Terrain

Currently I am painting the Townhouse from Stronghold Terrain. After the Guild House, where I was very unhappy with the stonework, things are better this time. In fact, I think these are the best stones I have done so far. These walls paint up really nicely. More coming soon.


Tuesday, March 6, 2012

Back and Looking Forward


Yay, I'm back! It feels like it's been ages since I last painted something but now there's new stuff coming soon at last. It feels great to be painting again and I can't wait to post some of the stuff I'm currently working on. More soon.

Friday, June 4, 2010

Scratch-built Gallows

As a break from painting the (fabulous) Tabletop World houses I chose to scratch-build something quick that I had been wanting to do for a long time: gallows. Every table needs gallows. You can use them in wild west games, pirate games, x civil war, Mordheim - everywhere. It's one of those standard pieces almost every gamer has tried their hands at so now it was time to do one myself. This will be the centrepiece of my Gierburg market square, where the citizens watch the charlatans being put to justice while doing the weekly shopping spree. I am also using it (already) in my current pirate games.

I searched the internet for inspirational images but didn't find anything particularly to my liking that I could flat out copy. So the design is a mix of various depictions I have seen and what I felt would be a good design for gaming purposes. Now without further ado here is the piece:


The piece is made from all sorts of wooden sticks from my "wood bitz box": coffee stirring sticks (a pack I bought on ebay years ago, which seems to last a lifetime), toothpicks, balsa, un-/used matches, tongue depressors and other stuff. It pays off to collect all sorts of wooden sticks over the years. The hinges of the trapdoors are bits of wire. I glued the various pieces with glue gel, by the way. It dries much quicker than PVA and was just perfect for this construction.


I made this small lever which will be used in the games to activate the trap doors - from then on it's only few turns until it's all over. The attackers will have to prevent the executioner and other enemy models from moving into base contact with the lever and pulling it.


The stairs have a bit of space between the steps so that miniatures on 25mm bases can be placed on the steps (a system I stole from Pardulon's stairs I used on the Governor's Mansion):


It was a lot of work filing all the wooden strips and sticks but I am pretty happy with how the gallows turned out eventually. Now on to base-coating and painting...

Update: See the finished gallows here.
Related Posts Plugin for WordPress, Blogger...